Outgoing Payments
Creating a payment
From the Payments list, click +New.
There are two ways of generating payment data: manually or by using the Suggest Vendor Payments function. But first you need to select Bank Account No. in the header. This determines from which bank account the payment will be made and also to which bank the payment will be sent.
Suggest Vendor Payments
From the Payment menu select Suggest Vendor Payments....
Fill in the fields according to your needs. Check respective fields tooltip for a closer explanation to their meaning. Then click OK to create vendor payment lines.
Manual creation of payment lines
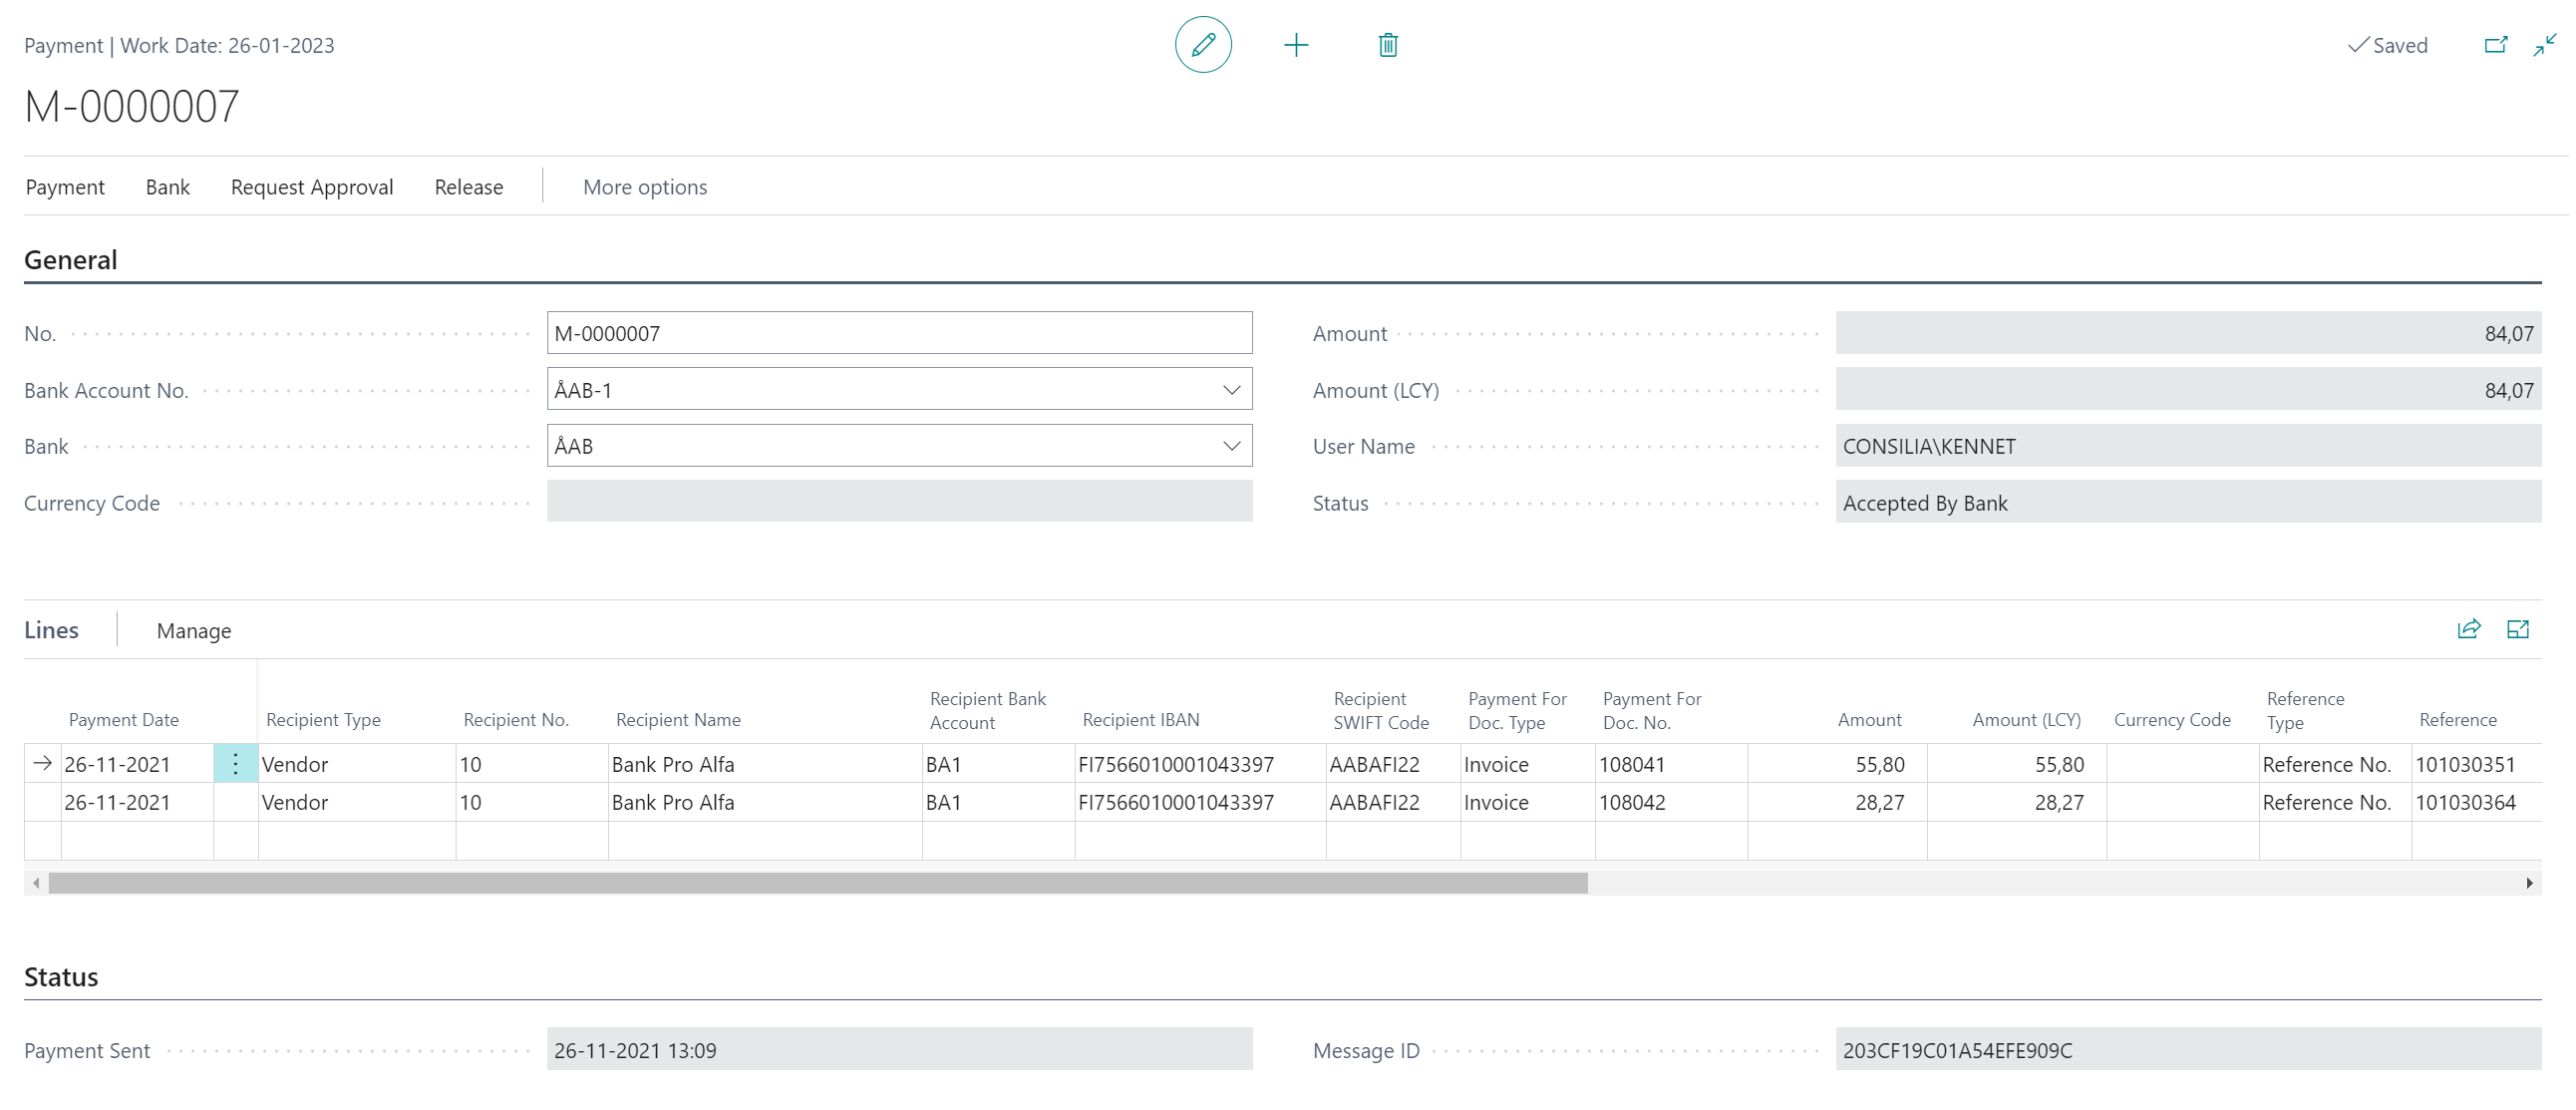
To manually create a payment, create a new line and fill in the fields. Depending on what is chosen in Recipient Type, many of the fields will have different meanings.
| Field | Description |
|---|---|
| Payment Date | Specifies the date that the payment should be made. |
| Due Date | Specifies the due date in the related posted purchase invoice. |
| Recipient Type | Select the type of recipient: Vendor, Customer, Employee, Internal Bank Account or External Bank Account. Depending on the type selected, different fields needs to be filled in. |
| Recipient No. | Depending on Recipient Type this will relate to different tables: Vendor, Customer, Employee or Bank Account. |
| Recipient Name | The name of the payment recipient. |
| Recipient Bank Account | Select from Vendor Bank Account, Customer Bank Account or Bank Account depending on Recipient Type (Vendor, Customer, Internal Bank Account respectively). |
| Recipient IBAN | Specifies the IBAN (International Bank Account Number) of the receiving account. Can be automatically filled in based on the value in Recipient Bank Account if applicable. |
| Recipient BBAN | Specifies the BBAN (Basic Bank Account Number) of the receiving account. Can be automatically filled in based on the value in Recipient Bank Account if applicable. |
| Recipient SWIFT Code | Specifies the SWIFT code (BIC) of the receiving account. Can be automatically filled in based on the value in Recipient Bank Account if applicable. |
| Recipient Bank Clearing Standard | Specifies the clearing standard for the recipient´s bank. Can be used if Recipient SWIFT code is not known. |
| Recipient Bank Clearing Code | Specifies the clearing code for the recipient´s bank. Can be used if Recipient SWIFT code is not known. |
| Payment For Doc. Type | If Recipient Type is Vendor or Customer, you can select a document type (Invoice, Credit Memo etc.) that this payment will be applied to when it is posted. |
| Payment For Doc. No. | If Recipient Type is Vendor or Customer, together with Payment For Doc. Type, you can select a Document No. that this payment will be applied to when it is posted. |
| Currency Code | The currency in which to make the payment. |
| Amount | The amount to be paid. |
| Amount (LCY) | The amount to be paid given in LCY. |
| Reference Type | The type of reference to send to the recipient. |
| Reference | The reference information to send to the recipient. |
| Charge Bearer | Specifies who bears the charges for currency payments (Shared, Debtor or Creditor). Not applicable for SEPA payments. |
| Status Message | Displays any error or information messages received from the bank when using Get Status From Bank on the Bank menu. |
Note
Although it is possible to create currency payments with the recipient type External Bank Account, our recommendation is that the recipient of the foreign currency payment is always set up as a recipient, e.g. Vendor.
Sending a payment
Release the payment
In order to send the payment, it must first be released. If an approval workflow has not been set up, just click Release in the Release menu. If an approval workflow has been set up click Send Approval Request from the Request Approval menu. When the payment has been approved Status will be set to Released.
Send the payment
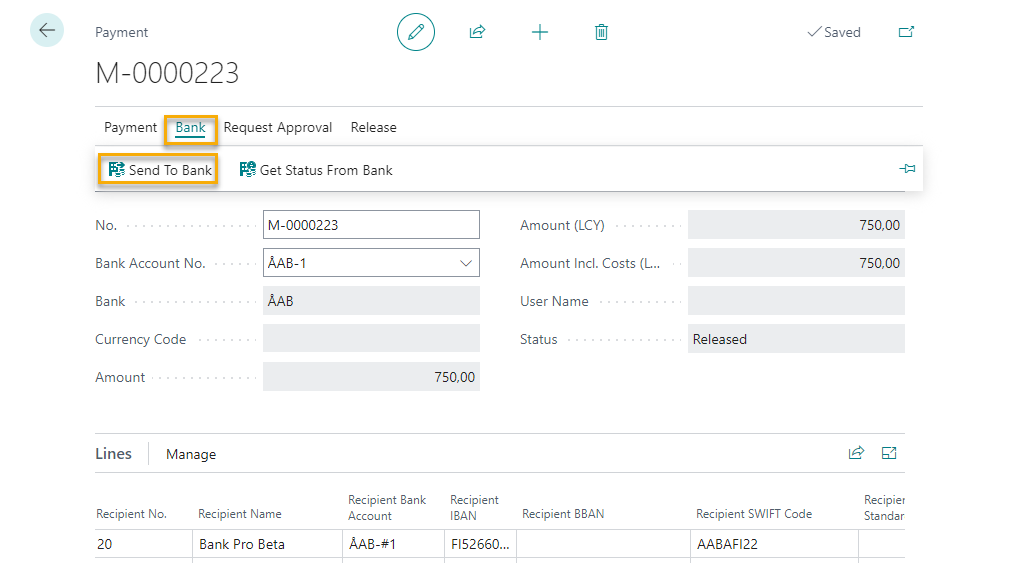
To send the payment to the bank, click Send To Bank on the Bank menu.
Checking the status of payments
From the Bank menu, select Get Status From Bank. This will retrieve available payment status reports from the banks and update the Status of the Payment in the header and also the Status Message field, in case there was a problem with a payment.
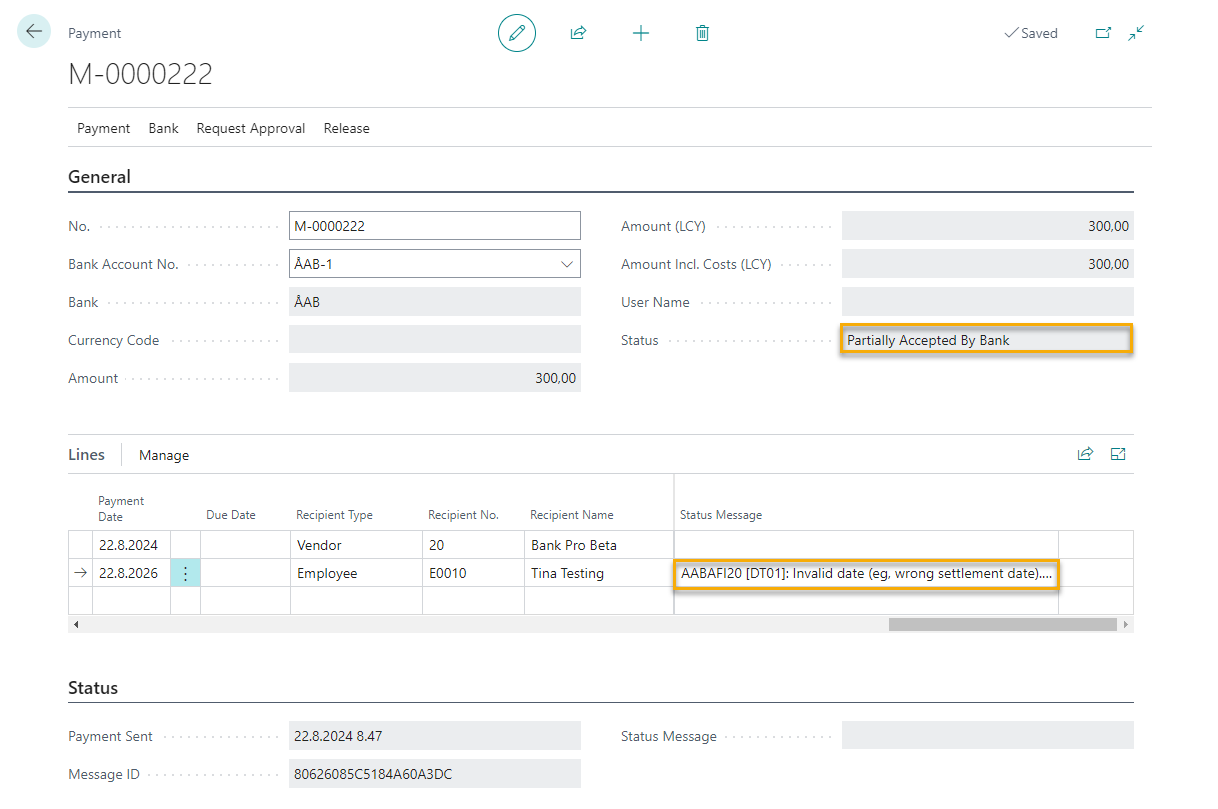
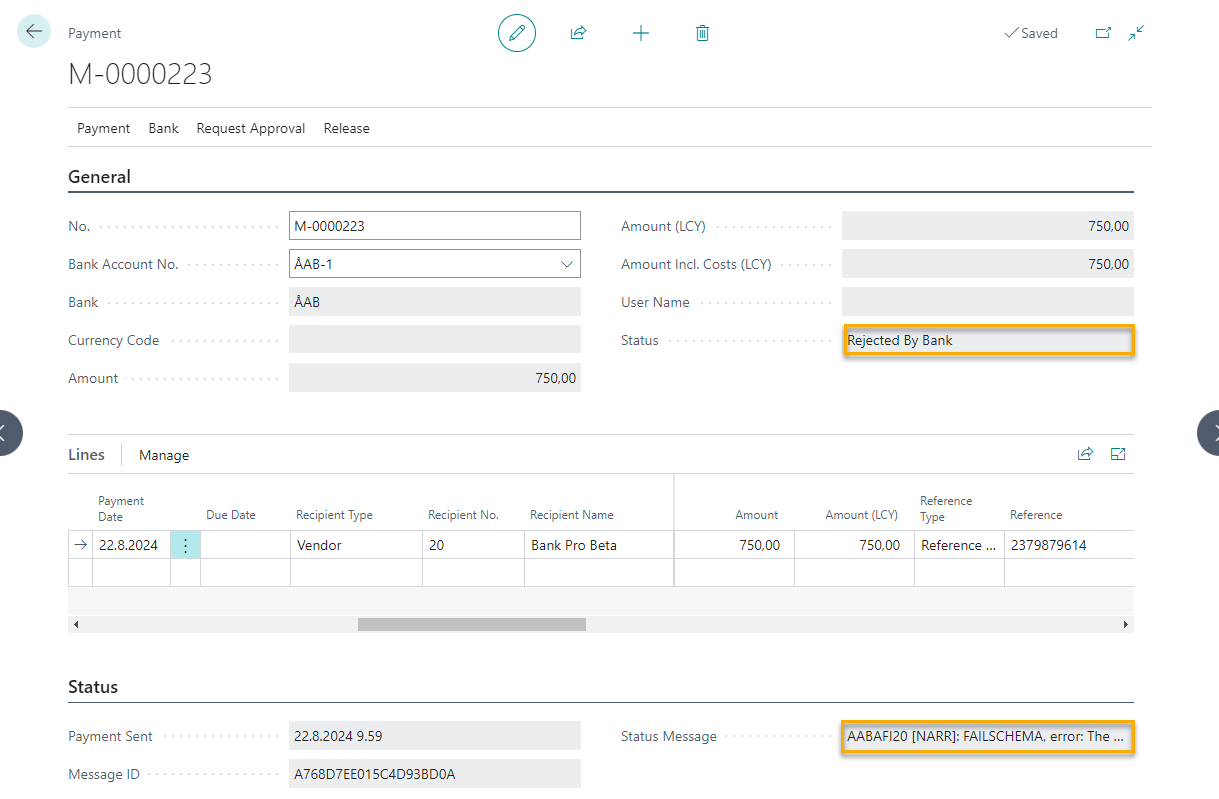
Depending on whether it is a single payment that has been rejected or all payments in the payment file, the reason for the rejection can either be displayed in the Status Message field on the payment line of the payment concerned or in the Status Message field below the payment lines.
Example 1. The payment file contained several payments of which one payment was rejected in the bank. After retrieving the payment status from the bank, the Status in the header is Partially Accepted By Bank and at payment line level the reason why the payment was rejected is displayed.
Example 2. The payment file contained only one payment, which was rejected by the bank. In this case, the status in the header is changed to Rejected after the payment status is retrieved from the bank and the reason for the rejection can be found either in the payment line in the Status Message field or below the payment lines in the Status Message field, depending on the reason.
Posting a payment
When you have made sure that the payments has gone through (using for example the Account Statements) you will want to post the payment in order to create the entries needed and close any vendor or customer entries applied to the payments. This is done by selecting Post or Post and Print from the Payment menu.
Note
If there is a rejected payment in the payment lines, it needs to be removed from the payment lines before the payments can be posted.
Posting rules
Depending on the Recipient Type that is used on each line the amounts are posted to different G/L Accounts.
The total amount of the payment (Amount (LCY) in the header) is posted to the Bank Account No. set in the Payment. That means that the amount is posted to the G/L Account specified in the field G/L Account No. in the Bank Acc. Posting Group specified on that bank account. And of course also to the Bank Ledger Entries of that Bank Account. This is balanced using the total amount of all the lines which are posted according to the following rules:
| Recipient Type | How is the line posted? |
|---|---|
| Vendor | As if you would post a General Journal using Vendor in Account Type. The Vendor Posting Group is used to determine for example which Payables Account is used. |
| Customer | As if you would post a General Journal using Customer in Account Type. The Customer Posting Group is used to determine for example which Receivables Account is used. |
| Employee | As if you would post a General Journal using Employee in Account Type. The Employee Posting Group is used to determine for example which Payables Account is used. |
| Internal Bank Account | Posted as a transfer from the Bank Account No. specified in the payment header to the account specified in Recipient Bank Account on the line. Each Bank Acc. Posting Group determines which G/L Accounts are used. |
| External Bank Account | The G/L Account that is specified in Recipient No. is used for posting the line. |
| G/L Cost Account | Posts directly to the specified G/L Account in Recipient No. like External Bank Account above. The difference is that this line does not create a outgoing payment, but can instead be used for registering for example a bank cost that occured when making the other payments. |


